

How to Purge Your 3D Printer
Yes, it is a given, your 3D printer will become clogged or have sticky melted material stuck to the nozzle. It happens; especially if you are using your printer on a regular basis.
But there could also be other issues. You want to make sure you are correctly identifying what the actual problem is.
Identifying the Problem
First, you want to determine the problem is actually in the nozzle.
There are other things that could cause issues and prevent the issues with printing, rather than gunk material sticking to the nozzle. Sometimes, the material can break at the entrance to the print head because the gear pushes it.
Your heating block can be faulty as well.
If none of these is an issue, then yes, you could have a clog, and will need to clean or purge the nozzle (where your material comes out of) of your printer.
There are a few ways to prevent, as well as fix, the problem.
What Causes It and How to Prevent your Nozzle Clogging
The road to 3D printing involves running into bumps along the way and dealing with:
- Chaotic filaments,
- Incomplete prints, and
- Extruder assembly that refuses to oblige.
Also, there are many chores associated with owning and maintaining a 3D printer. One of them is cleaning or purging your 3D prints nozzle.
Any designer or artist who has had their nozzle clogged, or not working, has had to learn the hard way of how to fix it or prevent it from happening again.
Simply said, you don’t have to put up with clogged nozzles. When you take care of your nozzle and extruder assembly, you can avoid these issues.
Here are the best ways to keep your nozzle clogged-free.
Before Switching Filaments, Clean your Nozzle
This is the most common cause of your nozzle becoming clogged – leftover filaments when changing them out.
At times, it can seem impossible to remove all of the material left behind in the nozzle. The fact is, though, it would be less stress and more comfortable if you persevere and remove the left-over material rather than clogging it more when adding a new filament.
Your Filament Needs to be Clean
When dirt or dust gets into your filament, it could burn when the hot end of the nozzle touches it. The material that is burnt as a result, can accrue over time.
When you receive filament straight from the manufacturers, usually, it is cleaned and can be used directly.
Anything leftover in the filaments needs to be stored in air-tight bags. For the best results, keep the filaments in vacuumed tight bags with a few packets of desiccant.
The Nozzle to your Printer Needs to be at Optimal Height
The space between your nozzle and the building platform needs to be at the correct height.
When the nozzle is too high, it will cause premature cooling of the filament and poor adhesion. However, when it is too low, it can cause retrograde extrusion.
This is a circumstance where the filament can’t move properly. Not only will your print suffer, but the retrograde extrusion can gridlock your nozzle.
The Right Temperature is Key
Since the nozzle is naturally smaller than the width of the filament, this means that the filament needs to be entirely liquefied before it can flow through the nozzle.
It is not recommended to set your temperature lower than what is suggested. This could affect the filament material causing cooling inside the nozzle. This is the most challenging jam.
How to Unclog Your Nozzle
Depending on how badly your nozzle is jammed, there are a few ways it can be handled.
Some solutions are as simple as using pins; others are using chemicals to melt the material that is causing the clog. Here are a few ways to fix the issue.
Brush the Nozzle from the Outside
The easiest solution is to clean the nozzle from the outside using a suitable brush.
This will only unjam the tip of the nozzle, and this may not clean out the worst of the clog. However, this is an easy solution to preserve your 3D printer.
Use a Pin to Push the Clog Out
If a small amount of filament is melted on the nozzle, it should be easier to push out the material with a pin or needle.
Many suggest that this is the easiest solution and works the best.
Removing the material this way, you will need to warm your nozzle to relax the built-up filament a bit. Don’t melt the material fully; you can do this with the hot end of the assembly, or it can be done physically, by using a heated air gun.
Further, push the jam out using the needle to remove it.
Removal by Cold Pull with Nylon Filament
This the most consistent way to remove a clog, especially if there is a significant amount of filament.
When performing a “cold pull,” you want to be using another piece of filament. Nylon filament is the best choice for this method due to its high melting temperature.
Nylon filament is a material used for 3D printing; it is a strong material when using a higher fill setting.
To perform a cold pull method, you need to dismantle the extruder setup first.
This is because you will need to push the filament through the nozzle manually. Make sure the nozzle is heated at 250 degrees Celsius, or 482 degrees Fahrenheit.
You want to leave it at that temperature for 5 minutes.
Gently push the nylon filament through the nozzle. The clogged material should be melted fully and extruded to the nylon.
Continue this method until all the old material is gone, and all the nylon now exiting the nozzle is clean.
Now, you want to let the nozzle cool to room temperature so the nylon filament can become slightly stable. The nylon needs to become soft enough to pull completely out. Give the material a firm tug, and it should come out of the nozzle.
This process can take a few times to make sure all the old material is out of the nozzle. If you feel like you’re are pulling the nylon hard, then the temperature needs to be a little hotter.
Soak the Nozzle in Acetone
This should only be done if everything else fails.
This process takes a long time and may not be as effective as the others.
To start, remove the nozzle from the heater block using a socket wrench. Soak the nozzle in the acetone for a few hours; the acetone will melt the material in the nozzle, and you should be able to clear it out with a needle or pin.
Once it is all cleared, you should be able to continue printing.
If the clog started because of ABS material, then you can soak the nozzle 15 minutes. ABS filament is a thermoplastic that is easily molded when heated and hardens evenly when cooled. This is a popular material used by 3D printing hobbyists.
Various manufacturing industries also use it.
If the filament you’ve used is not ABS and cannot be dissolved in acetone, try using a heat gun to melt the material. Once it is soft, use a smooth wire to push it through the nozzle.
What If you Strip Your Filament Away?
In most cases, this happens when there is pressure built up in the nozzle, causing the filament to get ‘stripped away’ by the hobs of the extruder. This means, aside from a clogged nozzle, now there is a problem of extruder gears.
If this happens, the evidence is easy to see. As you pull the filament, you will see sections that look like they have been ground away.
You need to make sure your nozzle and hot block are cleaned. If not, they are probably filled with plastic. When they are forgotten, and not cleaned out, it can no longer grasp the filament and extrude at the correct printing speed.
When you undo your extruder assembly to reach the hobbed gear, it can become messy. Be sure to know how to reassemble your device before taking it apart, or you’ll have an even bigger problem.
Also, check your warranty. If you are under contract and you proceed with this step, you can void your warranty out.
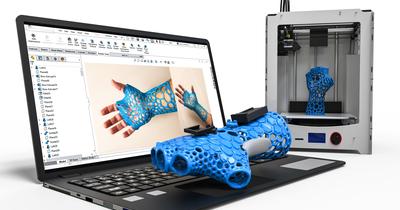
What is a 3D Printer?
Maybe this is new to you and you’re wondering what we’re talking about. In the most straightforward terms, a 3D printer is a form of additive engineering or better known as added material, not removed material. 3D printing is a revolutionary form of machinery that lets you produce a physical object from a digital idea.
A 3D printer fundamentally works by extruding molten plastic through a nozzle that moves around under computer jurisdiction. It prints one layer at a time, waiting for each layer to dry before printing upon it.
Here are the steps:
- First step: create a digital project. This is made in your digital programming on your computer.
- Next, you import. By importing the design to 3D printing software, the 3D printer will read the format.
- Hit save and transfer once it is incorporated into the device. Once saved, it will go straight to the printer.
- Finally, press print and watch your design come to life. The printer will create the coatings of material, one on top of the other. This happens through the melting block and out of the nozzle. You will start to see your design form.
What is 3D Printing Used For?
Across many different industries, there are multiple needs for a 3D printer. 3D printing has become extremely popular, and new printing applications are continually being developed. The reasoning for the upsweep in 3D printing use is that it is a simple technology that can be used in numerous kinds of applications across all types of industries. Before its popularity, 3D printing was expensive. But currently, nearly every artist or hobbyist has one at home.
In current years, there have been advances and different variations in the technology, both in machines and materials. Here are a few of the top applications for 3D printing technologies.
Education
Schools all over the world are adding 3D printing to their curriculum.
There are so many benefits of 3D printing being offered in schools:
- These students will be better prepared for the future.
- It allows students to be creative and have them learn a new skill is essential.
- The students have the luxury to learn how to strategize and have a creative outlet, resulting in producing something they can hold.
3D printing is beneficial for students because it bridges the gap for ideas to make it from the page, or the screen, to the world as a physical 3D design. Typically, these printers are found in classrooms and community libraries. Even universities have 3D printers accessible for their undergrads to use on projects.
Students get to explore the varieties of 3D printing. For example, they are often used in manufacturing, architectural, and archeological principles. These students are producing museum-like structures or historical artifacts that they can study inside the classroom without having to leave their comfort zone.
Graphic design undergrads can create representations of different objects with multifaceted working parts.
Students who are studying sciences are making and developing cross-sections of organs in the human body.
Chemistry students are producing 3D models of molecules and chemical compounds; 3D printers have taken education to another level.
3D Printing Prototypes and Manufacturing
When 3D printing was in its early stages, it was a way to make prototypes faster. With the traditional injection mold prototype creation, it was found to be expensive and took weeks to produce a single mold. The old way was very impractical for anyone trying to make improvements on a prototype.
The aerospace and automotive industries are additional groups that benefit from the advantages of 3D printing.
Now, companies are offering customization amenities where customers can create their designs and objects through simple web-based software.
3D printing machinery has produced ‘agile tooling.’ This is used for applications like manufacturing processes, for example:
- Hydroforming,
- Stamping, and
- Injection molds.
These are designed by modular resources, allowing the process of prototyping and responses for feature needs.
3D Printing Used for Medicine
Currently, 3D printing has altered the game in the medical field.
One specific example is bioprinting. This is where biomaterials, like cells as well as, growth factors are combined to produce tissue-like structures; for example, natural counterparts, like, prosthetics.
Because 3D printing is measured, the cost is lower. Before, it was problematic and luxurious to manufacture prosthetics to fit a patient. Formerly, children who needed prosthetics had to wait to get one until they had finished growing to be sure they wouldn’t grow out of it. Now, prosthetics can be 3D printed every few months.
Also, 3D printing is making it easier for the production of metal orthopedic implants. Because of 3D printing’s capabilities, people can create an assortment of surfaces, and types of implants are more easily assimilated with the patient’s natural bones, allowing them to grow into the implant.
For pharmaceutical testing, 3D printing tissues have been industrialized, cost-effective, and principled resources to help identify the side effects of drugs and authenticating safe dosages.
Construction
3D printing offers the construction industry a better way to fabricate and construct complex components.
Construction 3D printing includes extrusion. For example, professionals are able to us cement, wax, foam, and polymers for projects.
3D printing has a wide array of construction applications for:
- Private,
- Industrial, and
- Public sectors.
This allows companies to successfully:
- Work with complexity,
- Meet deadlines,
- Lower the cost of labor,
- Find greater practical incorporation,
- Produce less waste, and
- Provide greater accuracy.
Large-scale 3D printers anticipated the use of printing concrete, pouring foundations, and building walls onsite. They can also be used to create sections of concrete to be assembled later at the Jobsite.
Art and Jewelry
Jewelry making with 3D printing is the newest application.
This is used for artists who want to have fun with designs that are not possible with traditional jewelry-making methods. An individual can use 3D printing to create exclusive pieces of jewelry and modify pieces at a much lower cost.
3D printing has inspired artists all over the world to make jewelry.
Conclusion
Purging your 3D printer is part of maintaining your 3D printer. Clogs are regular; they happen to any artist and designer. The more you use your 3D printer, the more material is going to clog up the nozzle of your printer. This mostly happens to new hobbyists until you become familiar with the printer and the types of filaments.
Of course, prevention is much better than actually curing the clog; this could reduce the chances of your nozzle clogging. Nonetheless, when purging needs to be done, it’s better to have a solution to solve the clog.
The tips in this article should help you with any type of clog or built-up material. Be sure to proceed with caution, especially if you’re under warranty.