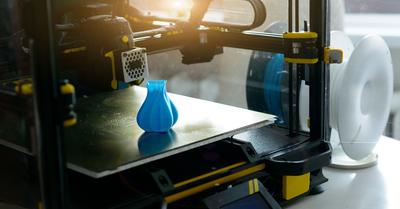
1. There’s Issues with Bed (Build Plate) Leveling
One potential reason that you keep getting the dislocation error is that the heated bed of the printer is not level. The part should be manually leveled so that the nozzle and heated bed are always an equivalent distance apart, no matter the stage of the printing process. (Note: You will also hear the bed referred to as the “build plate.”)
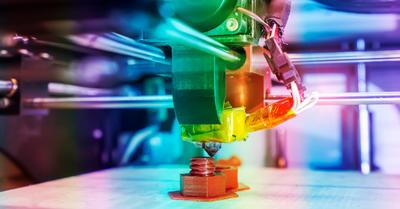
The nozzle of the 3D printer is the part that is responsible for depositing the filament that creates the printed object. Ifthere is too much space between the nozzle and the build plate, then the print won’t adhere to the surface properly. If there is too little space, then there will be a jam or dislocation.
How to Fix the Leveling
Consult the instruction manual for your specific model to determine the best method for leveling the build plate. Instructions for adjusting the build plate will vary widely from model to model. For example, some 3D printers may have touchscreen controls that can be used to fix the problem.
Here are some tools that you may need to adjust the build plate:
- Index Card: A piece of ordinary office paper cut to somewhere around 4 x 2 inches should be sufficient; this will exist as a placeholder between the build plate and nozzle during adjustments.
- Screwdriver/Hex Key: This may be needed in case screws hold down the bed.
- Heat-Resistant Gloves: In case you need to make emergency adjustments when the nozzle is still hot.
- Clean Cotton Cloth: For cleaning the nozzle and other interior parts of the printer.
- Spatula: May help scrape used filament off the plate. This spatula is specifically designed for 3D printing.
Generally, leveling your 3D printer’s bed will involve the following steps:
- Go to the printer’s settings to see if there is some manual leveling program that can be activated.
- You may be able to use touchscreen controls in the settings menu to move the build plate towards or away from the nozzle.
- The 3D printer may come with a calibration card that needs to be used following the instructions in the manual.
2. Poor Bed (Build Plate) Maintenance
Regular maintenance is the key to keeping your build plate from causing jams/dislocations in your 3D printer. The most important thing that you can do is routinely clean the interior of the printer, as to avoid letting leftover glue and filament build up inside the printer.
If your printer has a heated build plate, you are encouraged to use acetone to clean the surface. Acetone is most commonly used as a nail polish or paint remover; look for nail polish removers like the Pronto 100% Pure Acetone Nail Polish Remover if you need to remove stubborn plastic material on the build plate.
Note: Be careful about using chemicals to clean your 3D printer. Harsh cleaners can damage the surface coating on the build plate; this is why an acetone solution, like nail polish remover, is the preferred chemical for removing stubborn plastic inside the 3D printer.
Guidelines also call for 3D printer owners to use warm water to clean off leftover glue and filament from flex beds. The safest bet is to use warm water for cleaning off glue and filament; soap can be counterproductive as a cleaner. If you are going to use soap, make sure that you do so sparingly.
3. You Have Incompatible Printer Parts
3D printing machines can vary quite drastically in design. If your 3D printer keeps dislocating, there is a chance that parts may have been installed or replaced incorrectly. Since these are usually pretty expensive pieces of equipment, there is a chance that any second-hand 3D printer might have been outfitted with parts that are incompatible with your specific model.
- Start by looking at the instruction manual. If you do not have the proper manual on hand, look for a copy online or request a manual from the manufacturer. There should be serial numbers and other distinguishing model-specific information somewhere on the printer that will guide you towards the right manual.
- There should be an assembly section in the manual that includes a parts list. Parts can be bought online, as long as you are ensuring that they are compatible with the specific model that you have.
- Once you have located the instruction manual, you may proceed to take apart the printer to observe parts that may need to be replaced. The installation kit most likely came with some screwdriver or wrench for loosening and tightening the fasteners.
These are the tools that you may need to disassemble the printer:
4. You’re Using a Low-Quality (or Wrong) Filament
Repeated dislocations of a model during 3D printing can be a consequence of using a low-quality filament. Make sure that you are using a filament that is both compatible with your system and is of suitable quality for what you’re trying to print.
To find out which filaments are compatible with your 3D printer, you will need to consult your printer’s manual or visit the manufacturer’s website. It is essential that you check this before buying filament, as these materials are not necessarily universally compatible.
Common types of plastic filament include:
- ABS (acrylonitrile butadiene styrene)
- Will provide more “give” or “leeway,” making it suitable for mechanical parts
- Example: Gizmo Dorks Black ABS Filament
- PLA (polylactic acid)
- Should be used for prints requiring organic or biodegradable material
- Example: UNIS 3D White PLA Filament
- PETG (polyethylene terephthalate)
- Produces flexible and durable pieces and suitable for large, flat surfaces
- Example: SUNLU PETG Filament
- PVA (polyvinyl alcohol)
- Dissolves in water
- Example: Fused Materials PVA Filament
When you are loading the filament, take into consideration the size of the nozzle that you are using. Appropriate sizing of filaments will help ensure that dislocations or other similar issues will be less likely to occur.
For example, you may have noticed that filament comes in two different standard sizes: 1.75 mm and 2.85 mm (often referred to as 3 mm filament); these values refer to the diameter of the filament. You may choose to use a small nozzle, such as a 0.20 mm nozzle, for fine detail while printing; however, a 2.85 mm filament will not work well with a nozzle of this size.
5. The Nozzle Is Blocked
Over the course of operation, the nozzle may become blocked; this can cause the printer to misbehave in more ways than one. First, the quality of the end product will continue to deteriorate. A blocked nozzle can also cause printer dislocation. Filament stuck at the end of the nozzle can restrict movement.
You will need to clean the nozzle periodically to prevent such issues from occurring. You won’t need to clean the nozzle as often if you use the same high-quality filament materials all the time. If you are unsure about which filament to use, you can learn more about the subject in the section above.
If you notice porous structures on the surfaces of your printed objects, then you should take that as a sign that you need to clean off the nozzle. The following are the procedures for cleaning the nozzle.
- Make sure that the printer has been turned off.
- Access the module that holds the nozzle. Consult with the assembly section of your instruction manual if you are unsure of how to access this.
- Start loosening fasteners with the necessary tools, taking care to place fasteners and washers in a container on the side as you remove them.
- Unscrew the pneumatic fitting that feeds the filament into the nozzle.
Then proceed to follow the instructions for cleaning the nozzle as they are listed in the instruction manual. Look for instructions specific to your model in its owner’s manual.
Note: Fully cleaning the inside of the nozzle may require you to switch on the machine while cleaning, to heat the nozzle. You are always encouraged to seek the help of a printer maintenance professional if you are unsure of how to do this safely.
You may find a needle helpful for cleaning purposes. This is such a frequent issue that you can actually find 3D printer nozzle cleaning kits like this one. The cleaning kit should vastly simplify the process. Be sure to consult with the manufacturer of your 3D printer if this is your first time trying this.
6. Mispositioning of Print Pieces
To properly position your piece for 3D printing, follow these guidelines:
- Make use of CAD (computer-aided design) software that will help you design geometric forms. Beginners are encouraged to use a program like Tinkercad. You can also learn more about how to use the Tinkercad program with this book.
- Take note of the approximate dimensions of your design before your file is ready to print.
- Be sure to keep your piece’s print size within the available printing area when you view a 3D rendering before sending it to print.
- Don’t design models that have overhangs steeper than 45 degrees.
- Avoid jams by keeping the print speed relatively low.
- 60% infill is the highest that should be printed. (“Infill” refers to the percentage of the model that is solid plastic.)
It has been observed that most errors or printing failures will become apparent as soon as the first few layers have been added. Watch for errors during these early stages so that you can avoid dislocations that can lead to further problems later.
San Diego State University has a tip for ensuring that your 3D print job goes smoothly: Large, flat sides are best for 3D printing. If you were trying to print a pyramid, you would want to put the square at the bottom and the point at the top.
7. There Are Loose Screws or Fasteners
If dislocations are a persistent issue with your 3D printer, be sure to check the screws to see that they have all been tightened properly. Loose screws can be the root cause of this problem.
To tighten them, simply use your hand or the screwdriver or allen wrench that came with the printer. You may need to buy a set of allen wrenches or a screwdriver, if these tools are not already laying around somewhere in your toolbox.
8. There’s an Unstable Power Supply
Dislocation errors can actually be a result of the 3D printer being connected to an unstable power source. If the printer is not hooked up to a reliable source of electricity, then it is bound to be inadvertently shut off during the process.
This is a relatively easy fix that does not involve taking apart the printer itself.To resolve this issue, you can install a voltage stabilizer/surge protector to the power source for the 3D printer. You can find a good surge protector here.
The surge protector keeps electronic equipment from getting damaged during power outages. If you are running your 3D printer while you are running other equipment like the air conditioner, then you are leaving the printer susceptible to dislocations.
9. The Printing Speed is too Fast
If the nozzle in the 3D printer is moving too fast, you may encounter dislocation issues. If the nozzle of the printer moves really fast, then the motor of the printer will try to adjust to the speed demands. However, there is a max speed at which the printer’s motor will not be able to handle it.
The optimal speed for your printer depends upon several factors, so the manufacturer will usually prescribe any necessary adjustments. Your manual may also have some information about ideal printing speeds for your model.
When you’re ready to adjust the speed, it can be as simple as turning a knob. Printing speed might also be one of the values displayed on the home screen of your printer that can be adjusted by navigating the screen.
Here are some guidelines for adjusting printing speed to keep in mind:
- If dislocation has become a frequent problem for you, then adjustments to the printing speed may be necessary.
- Check the instruction manual to see if there is a recommended printing speed range.
- If you have found an ideal printing speed through trial and error, be sure to take note of the ideal printing speed in case another operator changes the value.
10. There is Low Belt Tension
Belts are used on 3D printers that can print objects continuously. If you have this type of 3D printer, then you will need to adjust the tension of the belt, as necessary.
The belt tension of your printer should have been calibrated at the factory using a calibrated meter to measure the audio frequency of the belt when it is strummed. (There is a direct relationship between the belt tension and frequency.) However, eventually, the belt will stretch over time and require adjustments.
If the belt tension is excessively high, you may notice the bearings on the machine wearing prematurely. On the other hand, a dislocation error on a 3D printer could be the result of a belt tension that is too low. Fortunately, this is an easy fix.
The instructions for tightening the 3D printer’s belt may vary slightly based on each specific model. That being said, the directions for tightening the belt will probably be similar to the instructions in this owner’s manual.
How to Adjust the Belt Tension
You will likely need a hex key to make this adjustment, provided that an internal hex screw holds down your belt.
You will also need a device that can measure audible frequency in Hertz (Hz). You should be able to find a tuner app for your phone that may or may not be free. Alternatively, you can use a tuning device, such as the ones used for musical instruments.
- Start out by turning off the printer.
- Move the print head to a position where you can pluck the belt.
- Place the tuning device/app next to the belt and adjust the tension of the belt using a hex key according to the 3D printer manufacturer’s recommendations. (For example, this manufacturer recommends adjusting the belt until the tuning device measures 82-84 Hz.)
Summary
Dislocations in 3D printing occur when the normal range of motion is restricted or obstructed. In summary, the ten possible causes of dislocation in 3D printers include:
- Issues with bed (build plate) leveling
- Poor bed (build plate) maintenance
- Incompatible printer parts
- Using a low-quality filament
- The nozzle has been blocked
- The positioning of the print pieces
- Loose screws/fasteners
- Unstable power supply
- Printing speed
- High belt tension
Fortunately, there are plenty of ways these issues can be resolved, so you can get back to working on your 3D print in no time.
